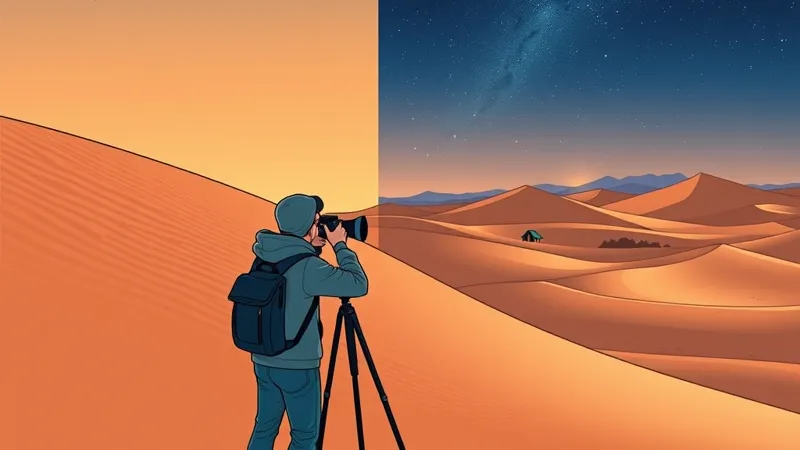
Photograph Sahara dune textures with low side light near sunrise or sunset; for stars, use a stable tripod, manual focus and test exposures. Around Merzouga and the Erg Chebbi dunes, start daytime landscapes at a low ISO and approximately f/8–f/11, adjusting shutter speed to the light. Keep equipment in a closed, zipped bag between shots and minimize lens changes, especially when wind lifts sand.
Erg Chebbi is the sand-dune destination beside Merzouga, not the rocky Agafay desert near Marrakech. Reaching it from Marrakech requires substantial road travel, so photography depends on your itinerary as much as your equipment. A late camp arrival can remove your sunset opportunity, while an early departure can shorten sunrise photography.
Moonlight, wind and camp lighting all affect results. A bright moon can reveal dune contours but reduce faint-star contrast; blowing sand can make a session impractical. Agree on a viewpoint and return route before leaving camp, and treat all settings below as starting points, not guaranteed recipes.
How do you photograph golden hour and the night sky in the Sahara?
Use the direction of light to shape dune photographs, and prioritize stability and accurate focus after dark. This compact reference separates the main subjects:
- Dune textures: near sunrise or sunset; RAW, low ISO, approximately f/8–f/11; keep the bag closed and avoid changing lenses.
- Moving people or camels: low light with enough illumination for movement; prioritize a faster shutter and raise ISO as needed; carry equipment securely and stop before adjusting it.
- Stars: after astronomical twilight, with the Moon suitably placed; a full-frame wide-angle starting example is a higher ISO, f/1.8–f/2.8 and 5–15 seconds; use a tripod and protect equipment between exposures.
- Moonlit dunes: when moonlight reaches the scene; test exposure against the histogram rather than copying star settings; keep spare batteries protected from grit.
Available apertures, stabilization and noise performance vary. Phones need their own workflow rather than direct translations of camera settings.
How much travel time should you allow from Marrakech to Erg Chebbi?
Allow a substantial part of your itinerary for road travel: Marrakech to Merzouga is roughly 560 km, about 9–10 hours by road, over the Tizi n’Tichka pass at 2,260 m. Sightseeing, meal stops, traffic and conditions extend the travel day; these figures are route-planning estimates, not universal transfer promises.
A typical three-day circuit spreads the outward journey across an intermediate overnight stop, followed by a desert night and a long onward or return journey. A slower itinerary with additional nights near Erg Chebbi gives you another chance if wind or cloud disrupts photography.
Keep route estimates separate from booking-specific logistics:
- Road distance and driving time: the approximate figures above describe Marrakech–Merzouga planning, excluding sightseeing. Confirm the actual route separately; they are not a measured track to your camp.
- Overnight stops: check the named accommodation and location on each itinerary. An intermediate hotel night is not another night beside the dunes.
- Camp transfer: ask whether the final transfer is on foot, by camel or by vehicle, and when luggage reaches camp.
- Walking distance: request the distance from the actual camp to a suitable viewpoint. No single figure applies across Erg Chebbi.
The Moroccan National Tourist Office provides destination context, but camp access and transfer schedules require individual confirmation. Compare the structure of a three-day Marrakech-to-Merzouga tour before assuming it accommodates photography. Via Sahara is an independent editorial comparison guide, not a tour operator, and has no guides of its own.
When is golden hour on the Erg Chebbi dunes?
Golden hour is a changing light condition around sunrise and sunset, not a guaranteed 60-minute window. Aim to reach a pre-agreed viewpoint around 30–45 minutes beforehand so you can compose without rushing.
Use the NOAA Solar Calculator for planning, checking your viewpoint’s coordinates, the date and Morocco’s applicable UTC offset. Do not assume the same offset applies throughout the year. Calculated horizon times cannot fully describe local dune obstruction, atmospheric conditions or the light on your subject.
- Side lighting reveals ripples through alternating light and shadow.
- Backlighting can define a dune edge, but keep bright highlights under control and avoid looking directly at the sun through an optical viewfinder.
- Clean compositions start before walking: photograph untouched sand first and keep your own tracks outside the frame.
A nearby ridgeline can hide the sun before calculated sunset. Choose a viewpoint with your guide or camp staff rather than assuming the highest visible dune is necessary.
What camera settings work for dune photography at sunrise and sunset?
Start with low ISO and a moderate aperture, then adjust shutter speed for exposure and subject movement. These are starting settings, not requirements for every camera:
- File format: RAW, if supported and useful for your editing workflow.
- ISO: start low; increase it when needed to preserve a usable shutter speed.
- Aperture: approximately f/8–f/11 for landscapes on an interchangeable-lens camera; test your lens rather than assuming the smallest aperture is sharpest.
- Shutter speed: set for correct exposure, camera stability and movement in the frame.
- Focus: place focus deliberately and inspect important foreground and background detail at magnification.
Check the histogram and highlight warnings. Bright sand may need positive exposure compensation if the meter renders it too dark, but backlighting or bright sky can require a different adjustment. Protect important highlights rather than applying a fixed compensation value.
Bracket cautiously for static scenes when contrast exceeds what one exposure can hold. Moving people, camels and blowing sand can create merging artifacts. For movement, use a faster shutter even if that means raising ISO or opening the aperture.
For phones, clean the lens using the manufacturer’s recommended method, use the main camera rather than heavy digital zoom, and lock focus and exposure where supported. Lower exposure if highlights wash out. Keep editing restrained: excessive clarity and saturation can erase subtle sand tones. Consult your model’s Nikon reference manual or equivalent official documentation for exposure controls and operating guidance; many phones have fixed apertures.
How do moonlight and season affect night photography near Merzouga?
Moonless conditions favor faint-star contrast, while moonlight can help reveal dune shapes. There is therefore no single best moon phase for every Merzouga night sky photograph.
For Milky Way photography at Erg Chebbi, seek a dark interval when the Moon is below the horizon, not simply a date labeled “new moon.” For moonlit landscapes, consider the Moon’s direction and height as well as its phase. A bright moon can illuminate sand while making faint stars harder to distinguish.
Use the US Naval Observatory astronomical data services to check Sun and Moon timing for your dates and location. NASA’s lunar science resources explain phases and reflected sunlight. Milky Way core visibility also depends on season, hour and direction; verify a date-specific sky chart before planning a session around it.
The US Naval Observatory defines the astronomical twilight boundary at 18 degrees below the horizon for the Sun’s center. After evening astronomical twilight, sunlight contributes less interference, but clouds, dust, moonlight and nearby lamps still matter. A desert address does not establish a particular darkness classification or guarantee visible stars.
What settings and equipment help photograph stars above the dunes?
A tripod, accurate focus and a lens that gathers enough light are more useful than a universal exposure formula. For a full-frame wide-angle starting example, try 14–24 mm, f/1.8–f/2.8 where available, a higher ISO and 5–15 seconds.
Focal length, sensor resolution, viewing size and the stars’ position affect acceptable movement. Inspect test frames at magnification and shorten the exposure if stars stretch; a single shutter-speed rule cannot account for every setup.
- Focus manually on a bright star using magnified live view, where supported.
- Take test frames and recheck focus after moving the camera.
- Use a two-second timer or remote release to reduce vibration.
- Set tripod feet firmly without burying joints or locks in sand.
- Carry charged spare batteries in a clean, protected pouch.
For a supported phone, stabilize it on a phone-compatible tripod, select night mode or the manufacturer’s astrophotography mode, and follow its instructions. Some phones automatically combine frames; avoid touching the device during capture. A phone can record useful night scenes, but faint-star detail varies substantially by model and conditions.
Agree on camp-light arrangements with staff before the session. Never switch off shared lights yourself. Describe stacked photographs or images blending separate sky and foreground exposures honestly rather than presenting them as single exposures.
How do you protect and clean a camera around Sahara sand?
Prevent grit from reaching openings and moving parts, and remove loose particles before wiping. Weather resistance is not sand-proofing, even on equipment marketed for outdoor use.
Before leaving shelter
- Fit a versatile lens and insert a charged battery and suitable memory card.
- Pack a zipped bag, an appropriate protective cover and manufacturer-approved cleaning items.
- Check the model manual for cleaning restrictions and operating limits.
During the session
- Close the bag immediately after removing equipment; keep it off loose sand where practical.
- Use a suitable cover without trapping excessive heat.
- Avoid lens, battery or memory-card changes in blowing sand. Return to shelter first.
- Stop using any mechanism that begins to grind; forcing it may worsen damage.
Back in shelter
- Remove loose grit using the method approved for that surface before wiping it.
- Do not use canned compressed air or blow with your mouth.
- Do not improvise internal sensor cleaning. Refer internal contamination or grinding mechanisms to servicing.
- Before moving cold equipment into warm, humid air, seal it in a suitable bag and allow it to acclimatize before opening.
Use the relevant Nikon manual or Canon’s official model-specific support guidance, not a generic cleaning routine that may be unsuitable for your equipment.
How should you prepare for temperature, wind and walking on dunes?
Prepare for sun, changing temperatures and slow walking on soft sand; distance alone does not predict how long a dune approach will take. Incline, footing, fitness, heat and camera weight all affect the effort.
Before departure, arrange:
- Layers suited to the forecast and time of day.
- Sun protection and drinking water agreed with your guide.
- A headlamp for your own safe return, used considerately near other photographers.
- Charged communications, without assuming continuous reception.
- A guide-approved route, turnaround point and return arrangement.
- A lighter camera load if the approach is demanding.
Consult Morocco’s meteorological authority for weather research and available forecasts. Check the forecast location and elevation: a distant station may not represent conditions on the dunes. Historical station averages, a short-term forecast and a camera’s manufacturer operating limits answer different questions and should not be treated as interchangeable.
Abandon the session if blowing sand makes equipment handling unsafe, visibility deteriorates, heat becomes difficult to manage or the return route becomes uncertain. Avoid solo night wandering and unfamiliar steep dune faces. Another composition is preferable to pursuing a shot beyond the agreed route.
What should photographers check before choosing a Sahara tour or camp?
Choose a camp and itinerary around confirmed access and timing, not the phrase “desert camp.” That label guarantees neither dark skies nor immediate access to a useful dune viewpoint.
Ask before booking:
- Is arrival planned before sunset, and what happens if the road journey runs late?
- Can departure accommodate sunrise photography?
- How many nights are actually near Erg Chebbi?
- Which transfers involve walking, camels or vehicles?
- Can a tripod travel securely, and where does larger luggage go?
- When is charging available, and what connections are provided?
- Which lights illuminate the camp and nearby dunes?
- Can staff agree on a safe photography location and return plan?
Budget camps may have basic facilities; private arrangements may offer more flexibility, but neither follows automatically from the label. The private-versus-shared tour comparison explains the trade-offs to check individually.
Ask permission before photographing residents, guides or other guests. Do not pressure anyone to pose or ask handlers to stress animals for a composition. Carry out all litter.
For drones, consult Moroccan customs before travel. Do not assume importation or flight is permitted; customs guidance does not by itself establish flight authorization.
Editorial and affiliate disclosure: Via Sahara independently compares travel options and may earn a commission from affiliate bookings. Tour inclusions must be checked individually; current prices and ratings belong in the GetYourGuide widgets on the tour pages, not in fixed article claims.
With your light, access and charging requirements identified, compare Sahara tour options and use the tour-page widgets to check current prices and ratings.
What else should you know about photography in the Sahara?
Is a phone sufficient, and do you need a tripod?
A phone is sufficient for many daylight dune photographs. A tripod is not universally necessary in daylight, but stable support is valuable for night modes and long exposures; available controls and results depend on the model.
Is sunrise or sunset better at Erg Chebbi?
Both sunrise and sunset can produce useful low-angle light at Erg Chebbi. Choose according to the viewpoint, itinerary and forecast; neither guarantees untouched sand, calm wind or clear skies.
Can you photograph the dunes during a full moon?
A full moon can illuminate dune landscapes while reducing faint-star contrast. Check moonrise, moonset and direction through the US Naval Observatory resources rather than choosing dates by phase alone.
Can you take photographs while riding a camel?
Photographing from a moving camel introduces motion and handling difficulties. Keep equipment secured, follow the handler’s instructions and request a safe stop for deliberate compositions rather than changing lenses or balancing a tripod while riding.
Is one camp night enough for photography?
One camp night can provide an evening and morning opportunity, but arrival and departure schedules may shorten both. Additional nights near Erg Chebbi provide more flexibility for weather and moon timing without guaranteeing better conditions.
Sources
These authoritative resources support trip planning and model-specific checks; their scope differs, and they do not establish an individual tour’s arrangements.
- NOAA Solar Calculator: solar timing; use the correct coordinates, date and UTC offset, allowing for local horizon limitations.
- US Naval Observatory — Astronomical Applications data services: Sun, Moon and twilight planning for the relevant location and date.
- Nikon online manuals: model-specific exposure controls, cleaning procedures and operating precautions.
- Morocco’s meteorological authority: weather information; distinguish station observations and historical records from forecasts.
- Moroccan customs: current customs guidance relevant to drone importation; separate flight permissions require their own confirmation.
Additional reference institutions include the Moroccan National Tourist Office for destination geography, NASA for lunar science and Canon support for Canon equipment care. Road estimates require separate route checking, while camp transfers, walking approaches and overnight stops must be confirmed against the selected itinerary.